
Topic In This Article
Introduction :-
e-GRAS is an online Government Receipts Accounting System. The departments which generate revenue for the Rajasthan Government are associated with e-GRAS.
To Login in e-GRAS, One has to click on new user. Thereafter requires to fill up their credentials. Once the login ID is generated then one is authorised to use e-GRAS for all types of challan (Education and GST etc.) submission.

Who can avail this Service :-
Any user who has to deposit rajasthan government receipts can use this facility provided in this portal. The user can be a single person, association, entity, government, semi-government units, companies and other all departments etc.
Advantages :-
There are some advantages to the citizens provided through e-GRAS areas follow:
- The e-GRAS facility is available on 24 * 7 hours.
- The e-GRAS offers ease of operation and convenience.
- On-line payment of taxes (No more queues and waiting).
- One can deposit on behalf of the firm, company, Department and others.
- Online Filling of single challan form minimum fields of the challan need to be filled.
Online Payment Procedure :-
The citizens can register through the official portal of e-GRAS to make payment online, follow the steps mentioned below:
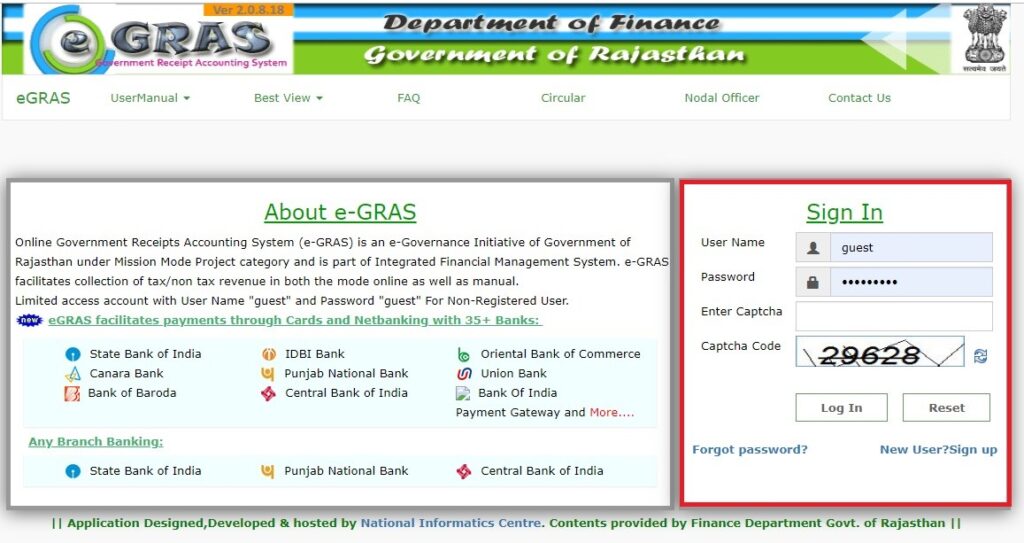
♦ Step 1 : Firstly, you have to log in through the website.
♦ Step 2 : If you are an existing user, in this website.
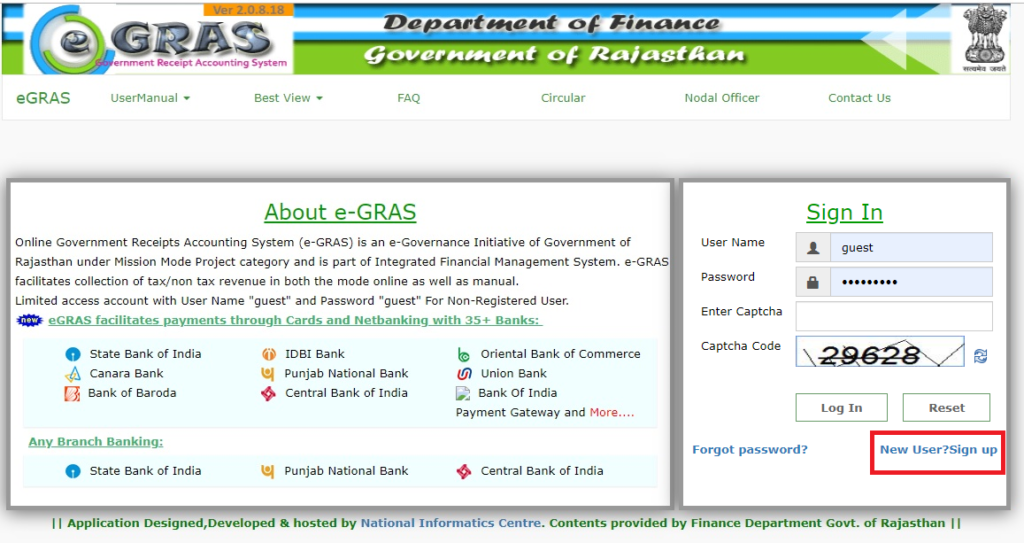
♦ Step 3 : If you are a new user, click on “New User?Sign up” button.
♦ Step 4 : where you need to fill the personal details and then click on the “Submit” button.
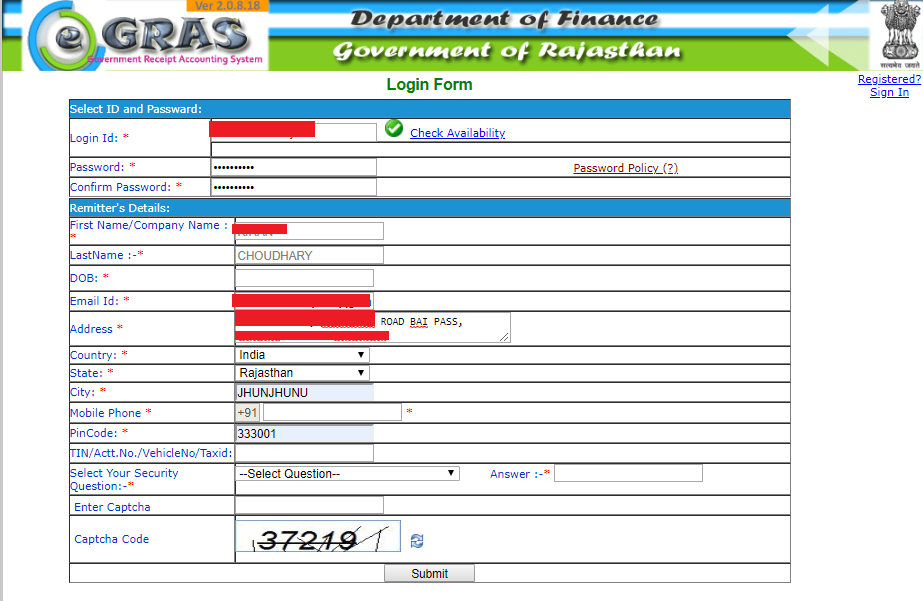
NOTE :- Every required information with a ‘*’ is to be entered mandatory with correct and reliable info.
- Login ID : In this field you have to provided a unique ID for login.
- Check Availability : By clicking on this link, you can find whether the login id you have provided ‘exists already’.
- Password : In this field you have to provide a password. You have to choose the password with the following orientation :
· Password should be contain at least 6 characters.
· Provide at least one numeric digit.
· Provide at least one capital letter.
· Password should contain at least one special character from @#$%*&. - Confirm Password : In this field provide same password who entered in ‘password field’.
- First Name : In this field you have provide to your first name.
- Last Name : In this field you have provide to your last name.
- Gender : In this field have to select your gender.
- DOB : In this field you have provide to your date of birth.
- Marital Status : In this field you have to select your marital status, whether ‘married’ or
‘unmarried’. - E-mail ID : In this field you have provide to your email id.
- Address : In this field you have provide to your address.
- Country : In this field you have to select your country from a given list.
- State : In this field you have to select your state from a given list.
- City : In this field you have to select your city from a given list.
- Mobile : In this field you have provide to your mobile number. ( Mobile no. verified by OTP)
- Pin code : In this field you have provide to your pin code.
- Select your security Question : In this field you have to select a security question from a given list.
- Answer : In this field you have to enter an answer manually to the security question.
- Capcha : In this field you provide to the capcha code.
Enter all the required information then click on the “submit” button.
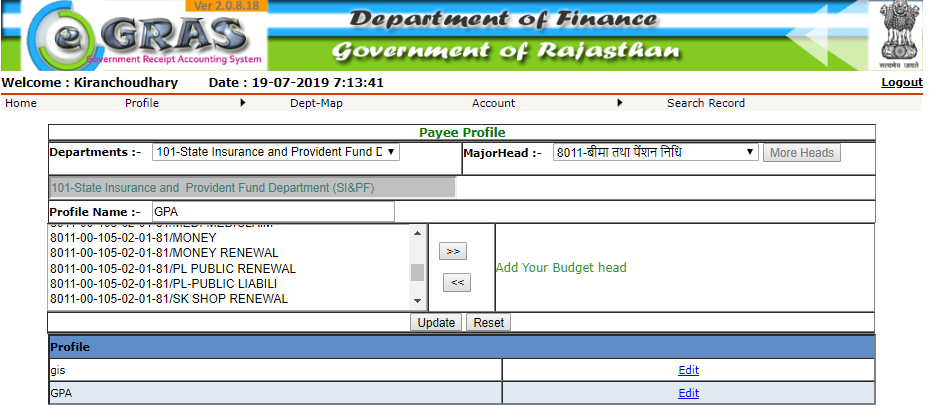
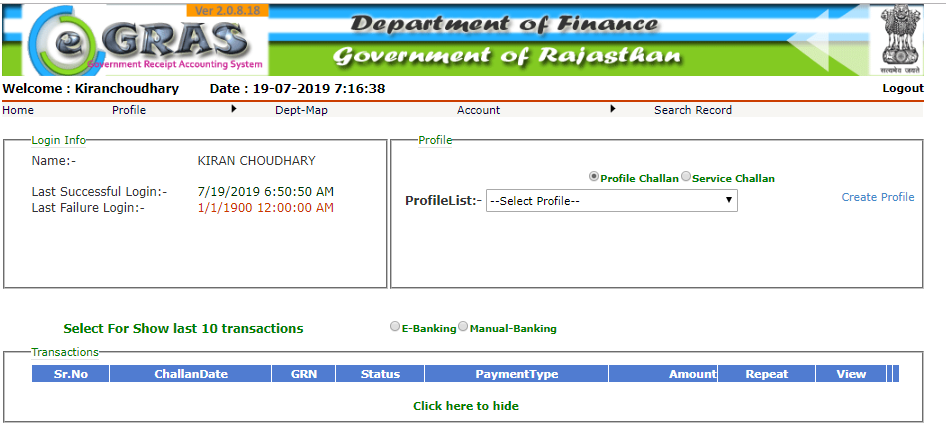
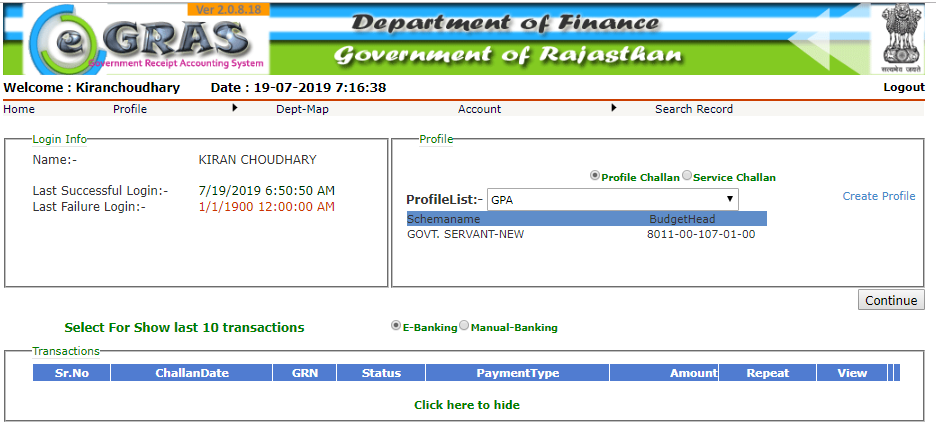
♦ Step 5 : Click on the ‘Create Profile’ link to generate payment profile. Provide profile name is manually. If you have already created a profile (GPA, education fee etc.). Then select your useful profile from the Profile List and “click” on the “Continue” tab.
♦ Step 6 : Department : Selected department name will display in the list.
♦ Step 7 : >> : To add budget heads in scheme click on >>.
♦ Step 8 : << : To remove budget heads in scheme click on <<.
♦ Step 9 : After selecting budget heads click on “submit”.
Reset : To discard all selected budget heads click on Reset.
♦ Step 10 : Select the challan profile. Thereafter select challan mode E- banking or Manual – banking and click on the “Continue” button.
Fill E-challan :
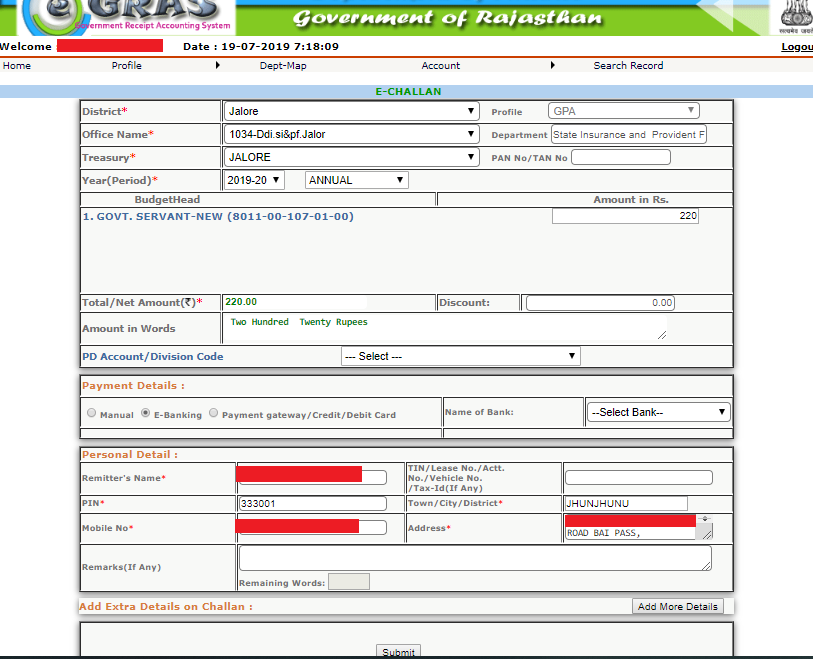
- District : You have to select location.
- Profile : Choose a required profile.
- Office Name : You have to select Office Name.
- PAN / TAN no. : You have to enter your PAN No.
- Year (Period) : You have to select Year.
- Budget Head : List of budget heads from schema/profile would display here.
- Amount in Rs. : You have to enter your Net Amount. Amount in words would be from server.
- Remark : Enter the remark or purpose of the challan you are submitting.
- You have to select a payment type.
a. e-Banking : user will be using online bank transaction.
b. Manual : user will be depositing amount in cash/cheque. - Remitter Name : Show automatically.
- PIN : Show automatically PIN code.
- Enter your Address.
- Enter budget head /purpose wise amount in rupees.
- Click on “submit” after furnishing all required information.
Que. – What is GRN.
Ans. – GRN ( Government Receipt Number )


1 thought on “e-GRAS (Government Receipts Accounting System)”